


Gain quick Insights with KiteSuite Dynamic Dashboard
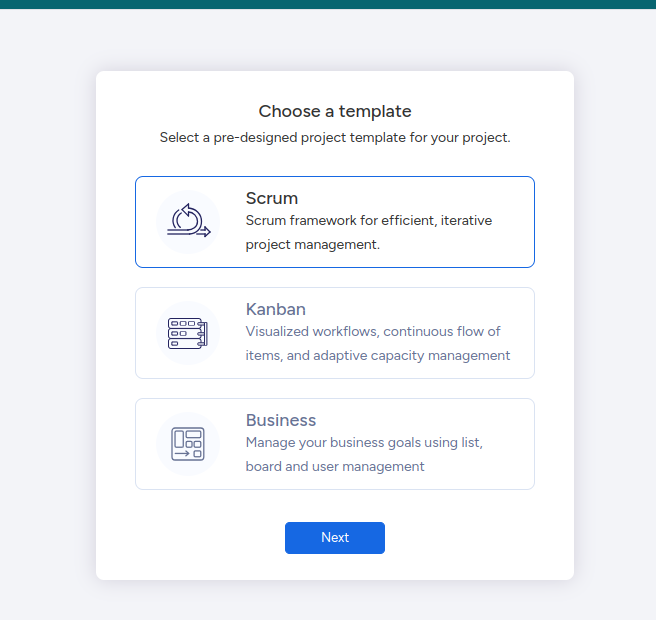
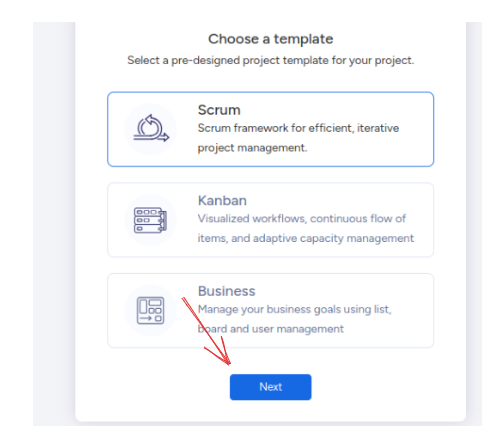
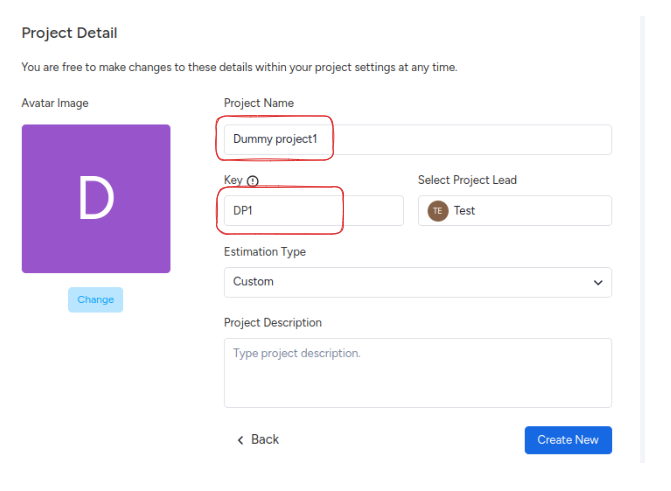
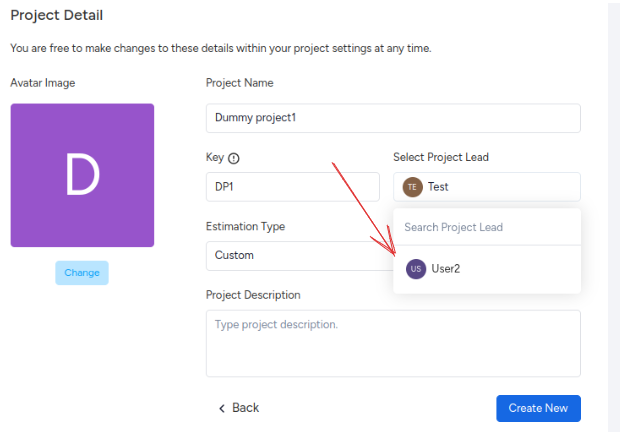
Achieve Success with Each Sprint
Collaborate and track your team's progress with KiteSuite
Enhance team Collaboration with KiteSuite Chat Feature
Easy Share and create documents with KiteSuite
Enhancing Productivity and Streamline Solutions
Preview project's overall health at a quick glance
KiteSuite لوحات معلومات قوية وقابلة للتخصيص
قم ببناء منتجات رائعة، سباقًا تلو الآخر
تعاون وتتبع التقدم الذي يحرزه فريقك مع KiteSuite
تعزيز اتصالات المشروع مع KiteSuite
مشاركة سهلة مع KiteSuite
تعزيز الإنتاجية وتبسيط الحلول
قم بمعاينة الحالة العامة للمشروع في لمحة سريعة
KiteSuite शक्तिशाली और अनुकूलन योग्य डैशबोर्ड
बेहतरीन उत्पाद बनाएं, स्प्रिंट by स्प्रिंट
KiteSuite के साथ सहयोग करें और अपनी टीम की प्रगति को ट्रैक करें
KiteSuite के साथ उन्नत परियोजना संचार
KiteSuite के साथ आसान साझाकरण
उत्पादकता बढ़ाना और समाधानों को सुव्यवस्थित करना
एक त्वरित नज़र में परियोजना के समग्र स्वास्थ्य का पूर्वावलोकन करें
Paneles de control potentes y personalizables de KiteSuite
Cree excelentes productos, sprint tras sprint
Colabora y sigue el progreso de tu equipo con KiteSuite
Comunicación de proyectos mejorada con KiteSuite
Comparte fácilmente con KiteSuite
Mejorar la productividad y optimizar las soluciones
Obtenga una vista previa del estado general del proyecto de un vistazo rápido
KiteSuite Tableaux de bord puissants et personnalisables
Créez d'excellents produits, sprint par sprint
Collaborez et suivez les progrès de votre équipe avec KiteSuite
Communication de projet améliorée avec KiteSuite
Partage facile avec KiteSuite
Améliorer la productivité et rationaliser les solutions
Aperçu rapide de l'état de santé général du projet
KiteSuite Мощные и настраиваемые информационные панели
Создавайте отличные продукты, спринт за спринтом
Сотрудничайте и отслеживайте прогресс вашей команды с помощью KiteSuite
Расширенная коммуникация проекта с помощью KiteSuite
Легко поделиться с KiteSuite
Повышение производительности и оптимизация решений
Быстрый просмотр общего состояния проекта