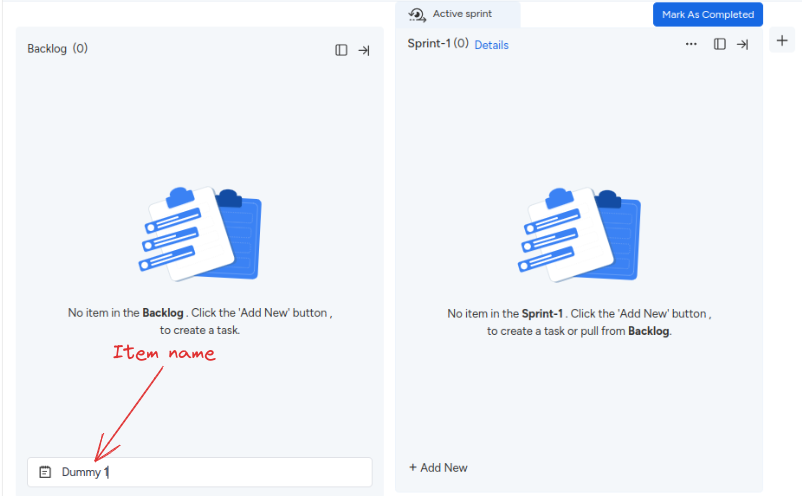
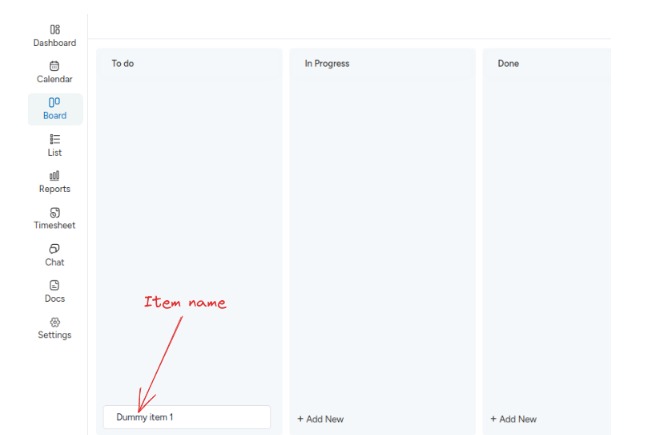
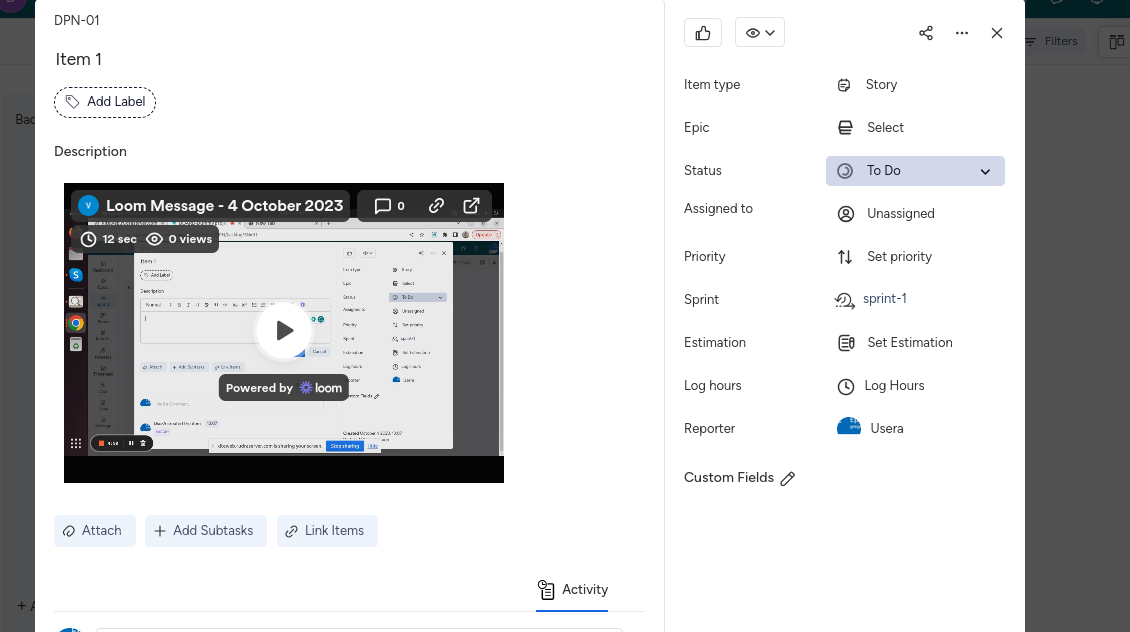
fbpx
kite-logo-svg

How can we help you?

Generic selectors
Exact matches only
Search in title
Search in content
Post Type Selectors

Item detail screen

Usually sprints are broken down into user stories. Each user story is then
further divided into items or tasks. And within those tasks, you have the
option to create subtasks for finer details. This module provides insights
into KiteSuite item management. You’ll discover how to create and edit items,
along with other useful features. Let’s explore these capabilities briefly:

Creation of item

Experience flexibility in item creation through various avenues:
  • 1. From the Epic Screen
  • 2. From the Backlog Screen
  • 3. From the Board screen
  • 4. From the Calendar Screen
  • 5. From the List Screen
From the Epic screen
Option 1
Step 1. Open the Epic screen and locate the “Create Item” button.
item-screen-1
Step 2. Click on the “Create Item” button to reveal the item creation panel.
Step 3. Enter the desired item name.
item-screen-2
Click “Submit” to finalize the creation.
item-screen-3
Option 2
Step 1. Access the Epic by clicking on the setting icon.
item-screen-4
Step 2. Click on the “Add Items” button.
item-screen-5
Step 3. Set the item name and confirm by pressing the enter key.
item-screen-6
From the Backlog Screen
Option 1
Step 1. Click on the “Add New” button. If you use the “Add New” button from the backlog section, the item will appear in the backlog. If you use it from the sprint section, the item will be placed in the sprint section.
item-screen-7
Step 2. Enter the item name and press the enter key.
item-screen-8
item-screen-9
Option 2
Step 1. You can also create an item directly from the backlog list view.
item-screen-10
From the Board screen
The board screen is available in all templates. However, for item creation, it’s exclusively accessible in the Kanban and Business templates. The user interface (UI) of the board screen is consistent in both Kanban and Business project templates, as shown below:
item-screen-11
item-screen-12
From the Calendar Screen
You have several options for item creation on the calendar screen.
Option 1
Step 1. Click the “Create” button.
item-screen-13
Step 2. Select the “Item” button from the menu.
item-screen-14
Step 3. A model will appear; enter the item name and click “Create”. Select the “Item” button from the menu.
item-screen-15
After creation, the new issue will be automatically dated with the current date.
item-screen-16
Option 2
To directly add an item to a specific date, click on that date’s box and add the item.
item-screen-13
From the List screen
The list screen is available across all templates, and the item creation process is consistent. Here’s how:
Step 1. Click the “Add New” button.
item-screen-14
Step 2. Enter the item name and press “Enter”
item-screen-15

Viewing Item Details

To access an item’s details, click on the respective item. The item detail screen comprises various sections, each explained below:
item-screen-16
1. Item ID and Name:
At the top of the item model, you’ll find the item ID (which can be disabled from project settings). Below this, you’ll see the item’s name or summary, editable by clicking on it.
item-screen-17
2. Item Label:
Below the summary, you’ll find labels associated with the item (as depicted in the screenshot).
item-screen-18
Creating a Label
Follow these steps to create a label:
Step 1: Click “Add label”. item-screen-19
Step 2: Select “Create New Label”. item-screen-20
Step 3: Enter the desired label name and press enter.
item-screen-21
After successful creation, the label will be visible, as shown in the screenshot.
item-screen-22
Label Editing
To edit a label, click on the edit icon which appears upon hovering over the label name.
Step 1: Click “Add label”.
item-screen-23
The label edit panel allows you to delete the label, rename it, and even assign a custom color.
item-screen-4
Removing the label
The label edit panel allows you to delete the label, rename it, and even assign a custom color.
Step 1: Click “Add label”.
item-screen-25 item-screen-26
Adding Item Description
To include a description, click on the “add description” button. This provides the opportunity to provide additional context or details for the item.
item-screen-27

Item Attachment

Attachments can be uploaded using the provided option. You’re able to upload
up to a maximum of 10 images at once.

item-screen-28

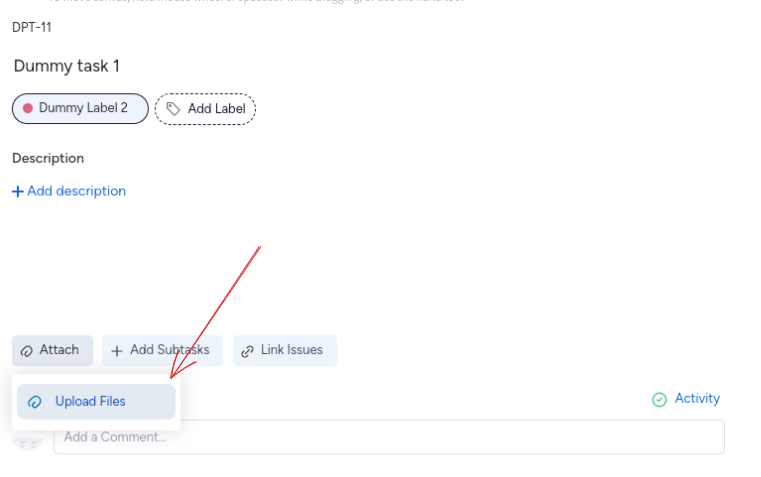
Initially, you have one attachment option. But you can also upload from
Google Drive and Dropbox by enabling
their integrations.
Github KiteSuite integration
This feature is initially disabled. To enable it, you need to integrate KiteSuite
with GitHub by following this link.

item-screen-28

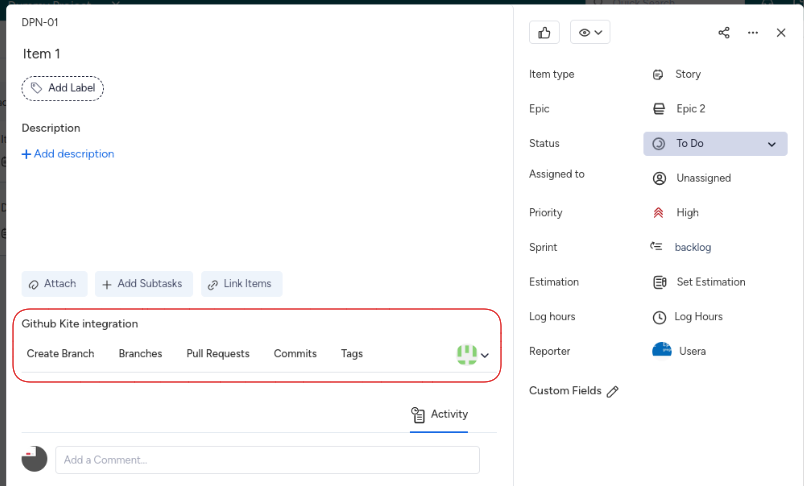
The GitHub integration can be divided into four parts:
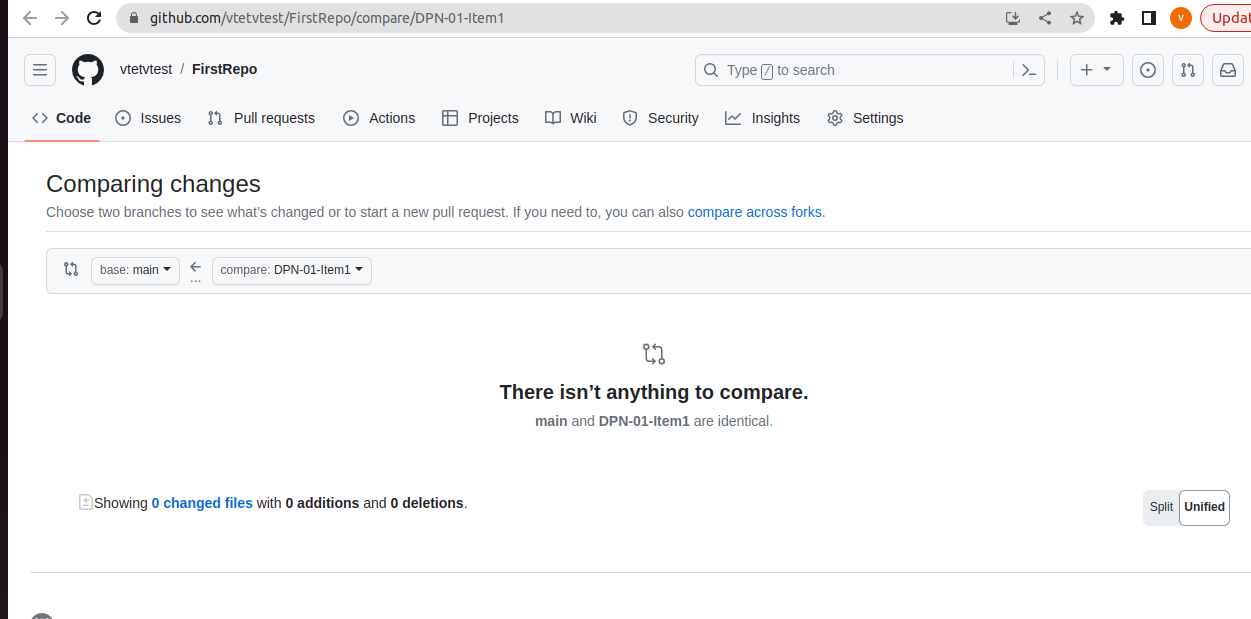
Create Branch
In this section, you can create a GitHub branch. Here’s how:
  • you will find the GitHub repository that you selected during integration.
    Pick a base branch from the options available.

item-screen-28

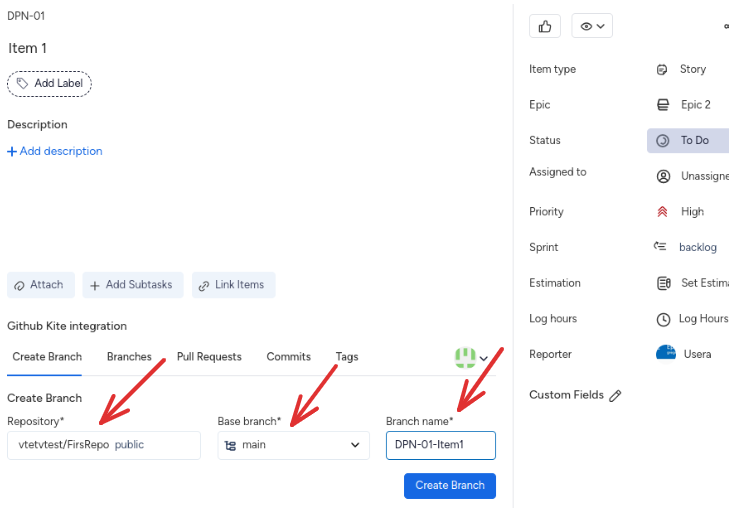
  • Specify the branch name, making sure to include the item ID.
  • Click ‘Create Branch.’
  • Visit GitHub to view the newly created branch.

item-screen-28

Branches
In this section, you can view all the GitHub branches.
In this section you can find all the github branches.

item-screen-28

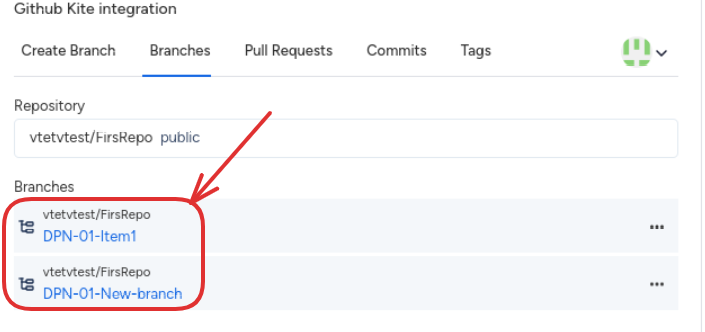
However, it’s important to note that in the branch name, the KiteSuite item ID is
mandatory for a branch to appear in KiteSuite.
For instance, if you have three branches in GitHub, KiteSuite will display only
two of them.

item-screen-28

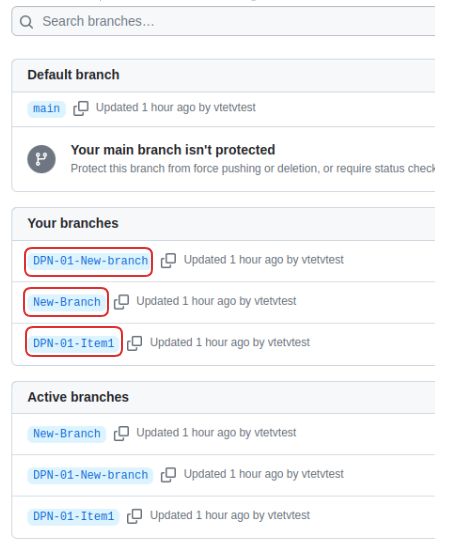
The branch ‘New-Branch’ won’t show in KiteSuite because it lacks the necessary
item ID in its name.

item-screen-28

In KiteSuite, branches are organized based on their associated item IDs.
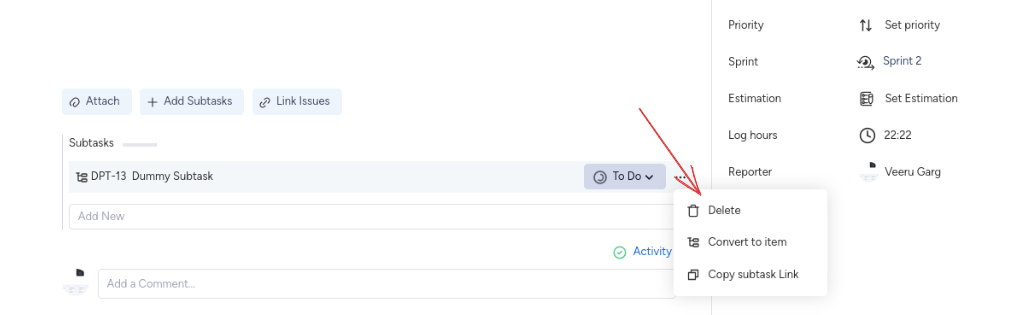
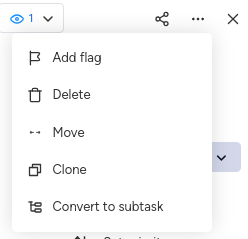
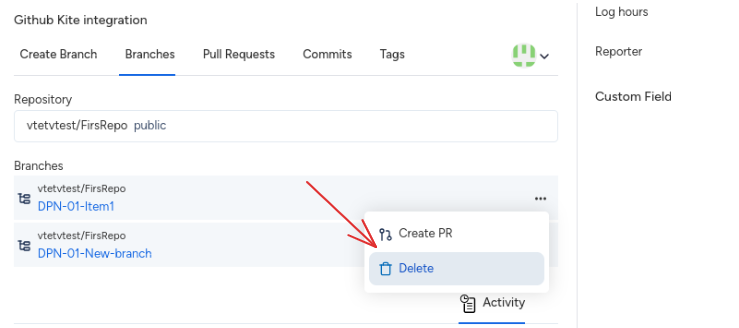
Actions on the branches
There are two actions you can take on branches: Create a pull request and
delete the branch.

item-screen-28

Once it’s created, you’ll find the same request in the section.
Delete the branches
To delete a branch, simply click on ‘Delete.’ This action will remove the
branch from both KiteSuite and GitHub.
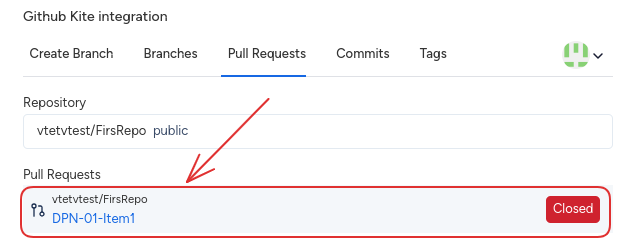
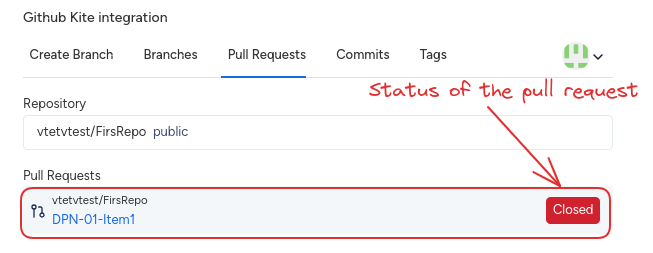
item-screen-28

Pull Request
In the ‘Create Branch’ section, you
can create pull requests. It displays all the pull requests associated with
the linked repository, along with their status.
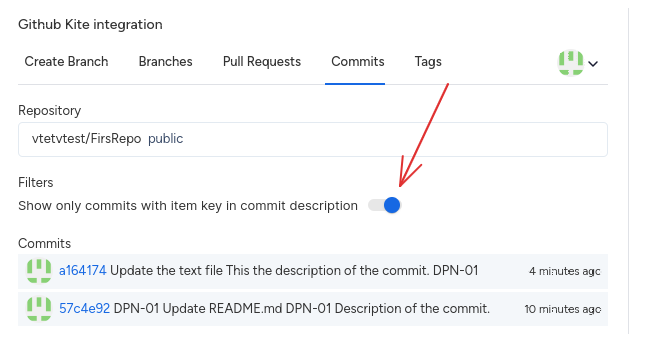
item-screen-28
item-screen-28

Commits
In the ‘Commits’ section, you’ll find a list of all commits related to the
linked branch.

item-screen-28

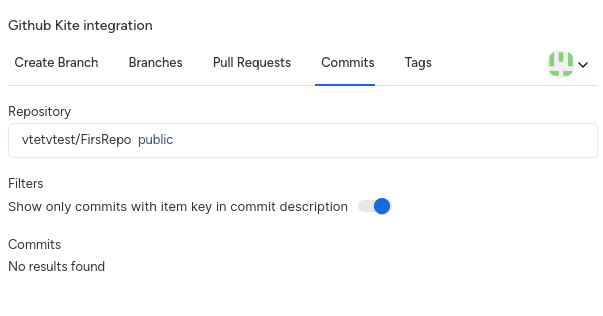
If there are no commits, it shows ‘No results found.’ Commit entries appear
only if their messages include item IDs. You can view all commits by
disabling the toggle, showing both commits with and without item IDs.
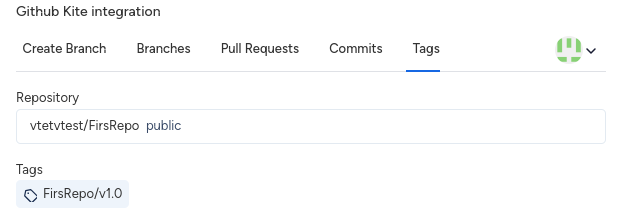
item-screen-28

Tags
The ‘Tags’ section lists all tags associated with the repository.

item-screen-28

Loom

To use the Loom feature within the item description, you need to integrate it with KiteSuite. Follow the provided link to set up this integration. item-screen-46
Use of loom
The Loom feature serves as a screen recording tool. It’s handy when you need to create a video recording of your actions or activities within the application. Simply use Loom to capture and share your on-screen actions effortlessly.
How to use loom
Follow the following steps, to used the loom :-
  • Step1: Click on the Loom icon, and a panel will appear.
    item-screen-46
  • Step 2: Click the “Start recording (5-minute limit)” button to begin your recording.
    item-screen-46
  • Step 3: Select the recording options that suit your needs and start capturing your video.
    item-screen-46
  • Step 4 :When you’re done, click the “Stop sharing” button to end the recording.
    item-screen-46
  • Step 5: Save the recorded video, and it will automatically appear in the description as part of your content.
    item-screen-46

Subtask within the item

Subtasks can be added within tasks using the following steps:
Step 1 Click on the “Add subtask” button. item-screen-29
Step 2 Enter the subtask name and press Enter. This creates the subtask. item-screen-30
In the Task detail screen:
  • You’ll find the subtask ID, subtask name, and its status.
    item-screen-31
  • Subtasks can be renamed, their status changed, or even deleted.
    item-screen-32
  • Conversion of a subtask to a task is possible via the “Convert to item” option. This transformed item appears in the initial list on the board screen. If there’s no sprint, it will be in the Backlog.
    item-screen-33
  • For sharing, you can copy the subtask link as well.
    item-screen-34

Subtask progress

In the task detail screen, you can monitor subtask progress. The progress bar updates according to subtask status. For instance, if a screenshot displays two subtasks—one marked “Done” and the other “Todo”—the progress bar is divided into blue and white. Blue represents completed tasks, hence a 50% blue and 50% white bar. item-screen-35
However, the subtask progress bar works solely with “Todo” and “Done” statuses. If subtasks are marked “In Progress” or other statuses, the progress bar remains unchanged.

Comment & Activity

In addition to managing tasks, you can engage in discussions and track activity within the task detail screen. You have the option to add comments to provide context or discuss specific aspects of the task. item-screen-38
Furthermore, the activity log at the bottom of the task detail screen captures a history of actions taken on the task. This includes any updates to assignees, linked tasks, added votes, or other relevant activities. This log offers a chronological record of task-related actions for easy reference.

Vote & Watcher

Enhance collaboration by utilizing the “Vote” and “Watcher” features for issues. You have the ability to cast a vote on an issue, indicating your interest or support for its resolution. This vote is viewable to other team members, promoting transparency and prioritization. item-screen-39
Additionally, you can designate specific team members as “Watchers” for an issue. This means they will receive updates and notifications related to that issue, enabling them to stay informed about its progress.
Add users as a watcher
Stay updated by designating specific users as “Watchers” for an issue. Follow these steps to add users as watchers:
Step 1: Click on the “Add watcher” option. item-screen-40
Step 2: Select the desired user from the project member list (Note: You can only add project members as watchers, not workspace members). item-screen-41
Step 3: Once you’ve clicked on the user’s name from the list, that user will be successfully added as a watcher to the issue. This ensures that they receive relevant updates and notifications about the issue’s progress and changes. item-screen-42

Other tasks actions

Apart from the basic task management, you have additional actions available for more control:
  • Add Flag: Attach a flag to an item to highlight its significance.
  • Delete: Remove the item permanently.
  • Move: Shift the item from the current project to a different one. item-screen-43
  • Clone: Create a duplicate of the same item for multiple instances.
  • Clone: Create a duplicate of the same item for multiple instances.
  • Convert to Subtask: Transform the current task into a subtask of another task, if needed.
These actions offer a range of ways to manage and manipulate your tasks according to your requirements.

Item Type

There are three primary issue types available: Bug, Task, and Item. Depending on your requirements, you can select the appropriate issue type from the dropdown menu. Please note that this feature is exclusive to the Scrum template.
item-screen-44

Add epic in item

You have the option to associate an epic with an item. This can be done by selecting an epic from the list provided, located below the issue type. It’s important to note that this epic functionality is specific to the Scrum template.
item-screen-45

Item status

You can check or change the status of a task from this drop-down. From the status, you can check the progress of that particular item. item-screen-46
Clockwise icon
Within the status section, there is a clockwise icon. The position of this icon on the clock face corresponds to the progress of the item. The clock pins change position based on how many lists or stages an item goes through. item-screen-47
For more about the status or list go here.

Item assignee

Assignee: You can assign a single person to the item from the list of available team members. However, in non-agile templates like Business and Kanban, you can assign multiple assignees. If no assignee is chosen, the task remains unassigned by default.
item-screen-48
In the assignee drop-down list, you’ll only see project members. If you want to assign a user who isn’t on the list, you have to add them in the “Manage People” section within the project settings.
Item Priority: You can set the importance level of an item using three priority levels: High, Medium, and Low.
item-screen-49
Sprint Assignment: You have the option to move an item between the backlog and different sprints using the provided dropdown menu. This feature is exclusive to the Scrum project template.
item-screen-50

Estimation

In the estimation field, users have the option to allocate an estimation to a specific task.
item-screen-51a
This can be done in two ways: using the Fibonacci series or a custom value.
Fibonacci series
By default, when a user creates a project, the estimation type is set as custom. However, you can adjust the type according to your needs, even from theproject setting screen. If you choose the Fibonacci type, the available values will follow the Fibonacci series.
item-screen-52b
You can pick a value from the drop-down list, with the Fibonacci values displayed up to 1000, which is the maximum estimation.
Custom Option
If you need to use a value that is not listed in the drop-down options, you can manually enter your preferred value.
item-screen-53c
Custom
When using the custom estimation option, you’ll find a dropdown with values that aren’t in the Fibonacci series. You can select a value from the dropdown list or manually enter a custom value according to your needs.
item-screen-53c item-screen-54c
Note: The custom estimation option is available in both the Fibonacci series and the Custom estimation types.

Log hours

In progress

Reporter

You have the ability to change the reporter of an item. By default, the person who created the item is assigned as the reporter.
item-screen-54

Due date

You have the ability to change the reporter of an item. By default, the person who created the item is assigned as the reporter.
item-screen-54

Custom fields

Apart from the usual item fields such as Issue type, Epic, Status, Assigned to, Priority, Sprint, Estimation of hours, and reporter, you have the flexibility to use custom fields that fit your unique requirements. To access these custom fields, just click on the edit pencil icon.
item-screen-56
Once you’ve added custom fields, you’ll see them listed in the custom fields section in task details, like this:
  • custom-slast
Create a date & update the date
When a task is created, its creation date is shown at the bottom of the item. If the user makes any updates to the task, you’ll see the update date displayed below the creation date.
custom-last